> For the complete documentation index, see [llms.txt](https://docs.upsellwp.com/llms.txt). Markdown versions of documentation pages are available by appending `.md` to page URLs; this page is available as [Markdown](https://docs.upsellwp.com/example-scenarios/category-based-upsell-for-logged-in-users.md).
# Category-Based Upsell for Logged-In Users
Learn how to create Checkout Upsell Campaign using UpsellWP where Upsell products are displayed for customer who have logged-in with a specific product in their cart.
#### Introduction
In this scenario, When the user logs in as a customer and buys products from a specific category, they will receive an Upsell offer on the checkout page.
This user guide explains how to create a Checkout Upsell Campaign using UpsellWP.
{% hint style="warning" %}
Please note that before proceeding, you must have installed and activated the UpsellWP. It is important to note that this feature requires the PRO version.
[Get UpsellWP PRO](https://upsellwp.com/)
{% endhint %}
#### Creating an offer:
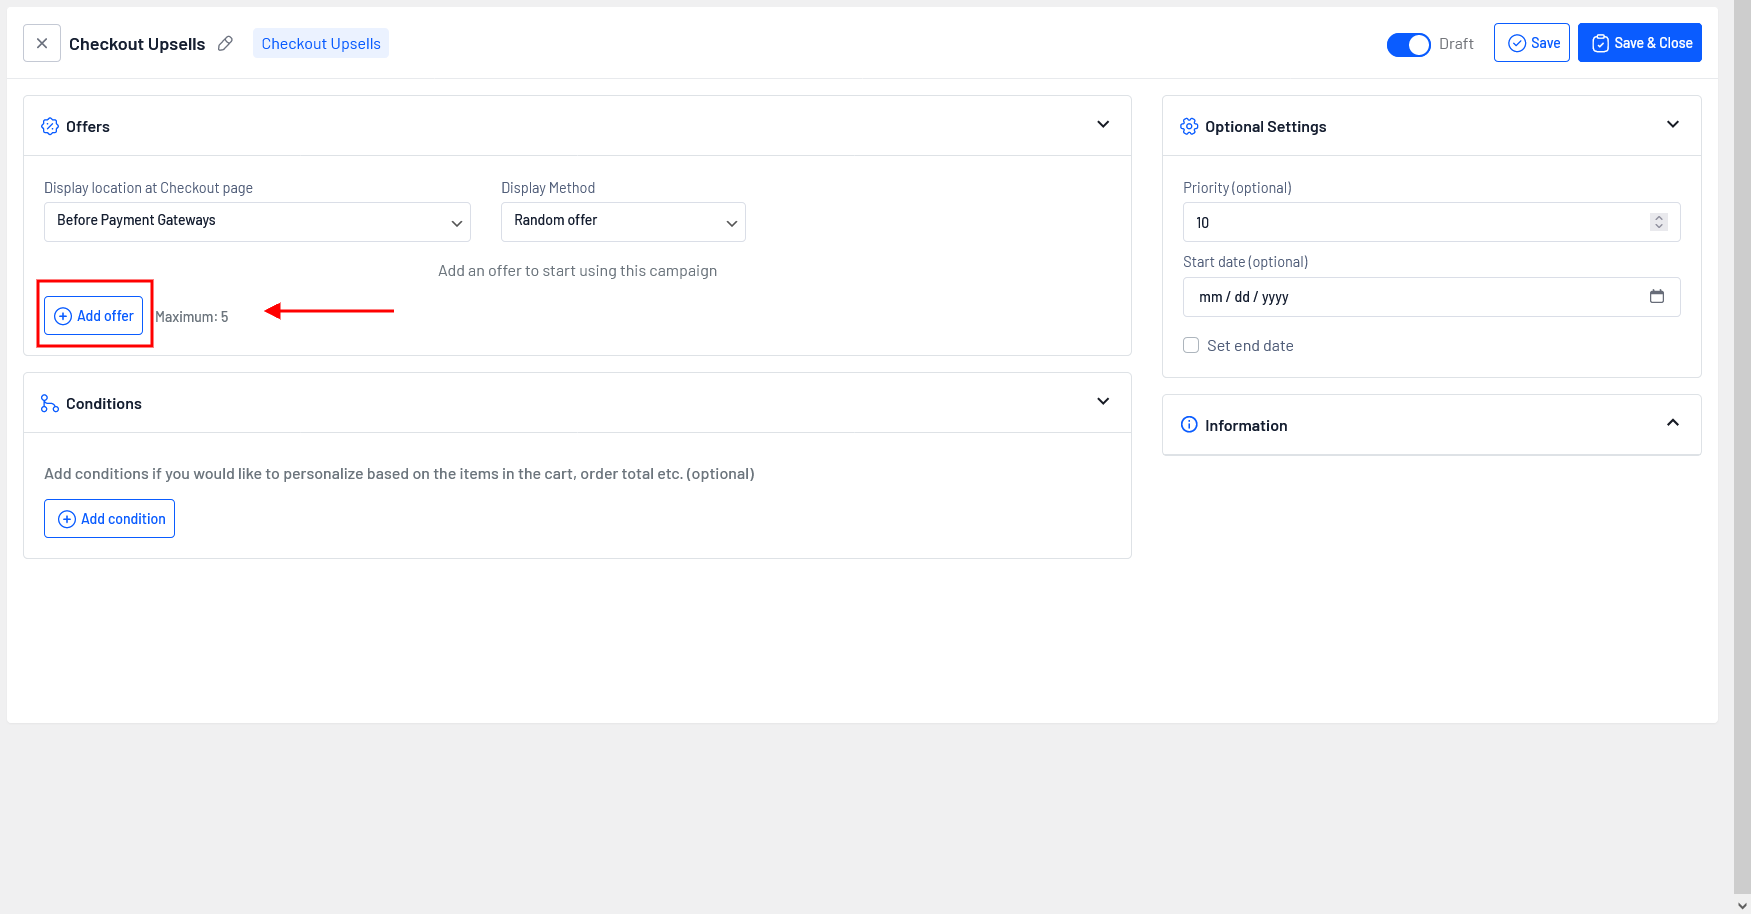
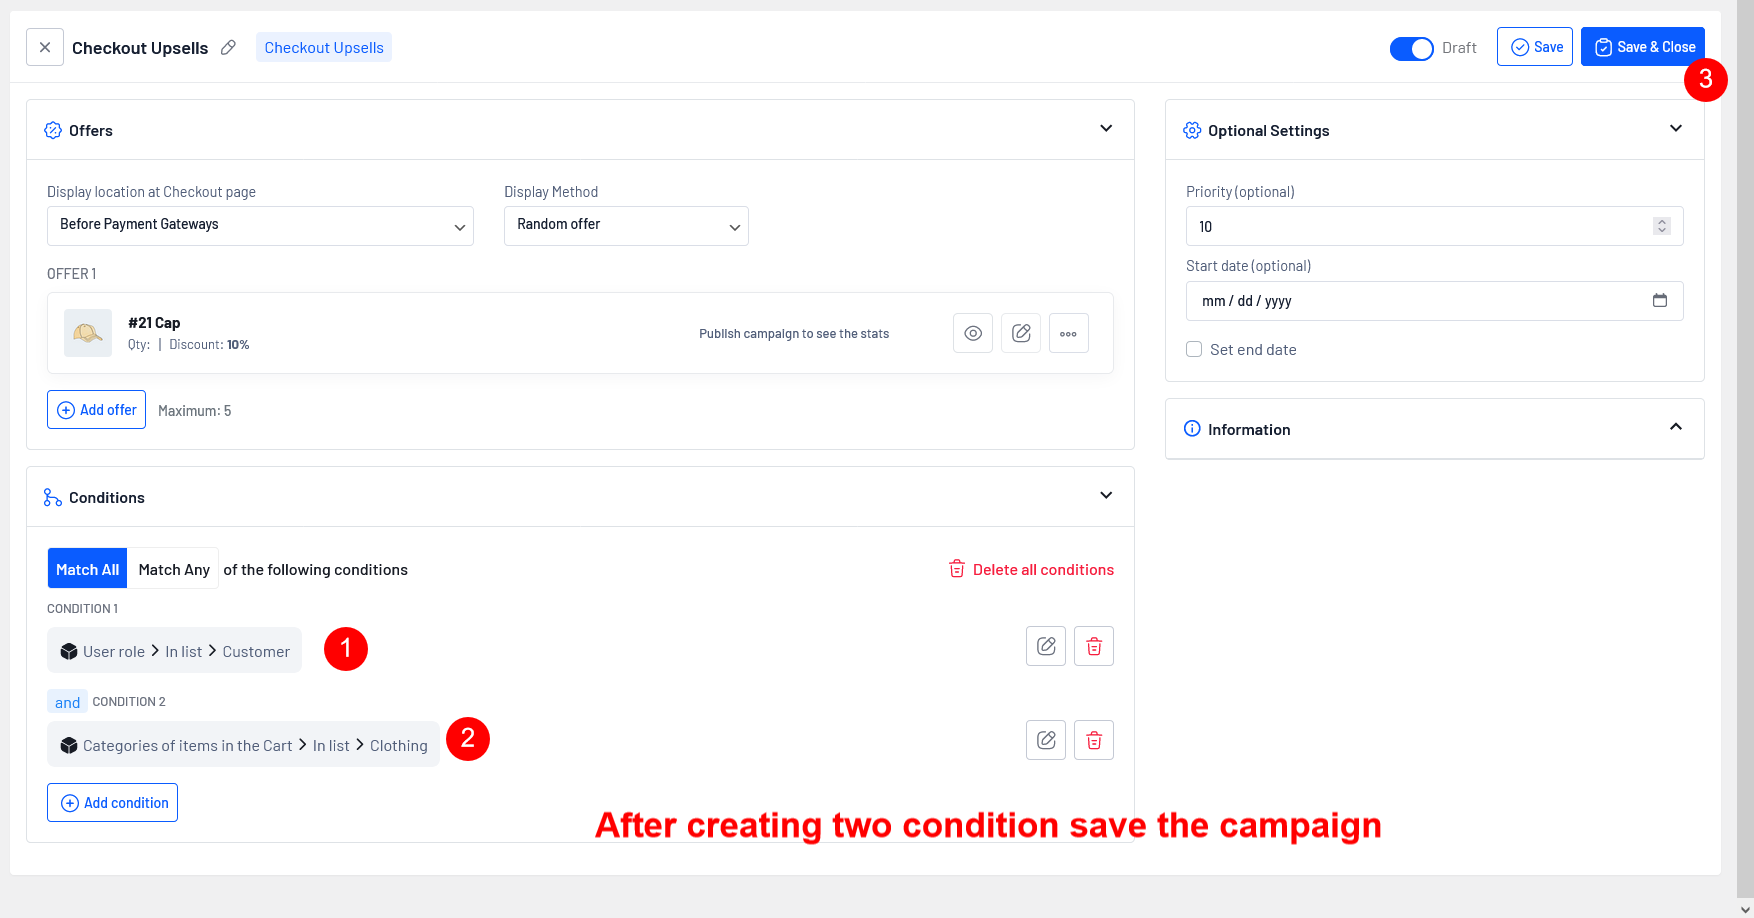
* Go to WordPress dashboard -> UpsellWP -> Create New Campaign -> choose “Checkout Upsell”.
* Click on the button “Add offer”.
#### Details of configurations are:
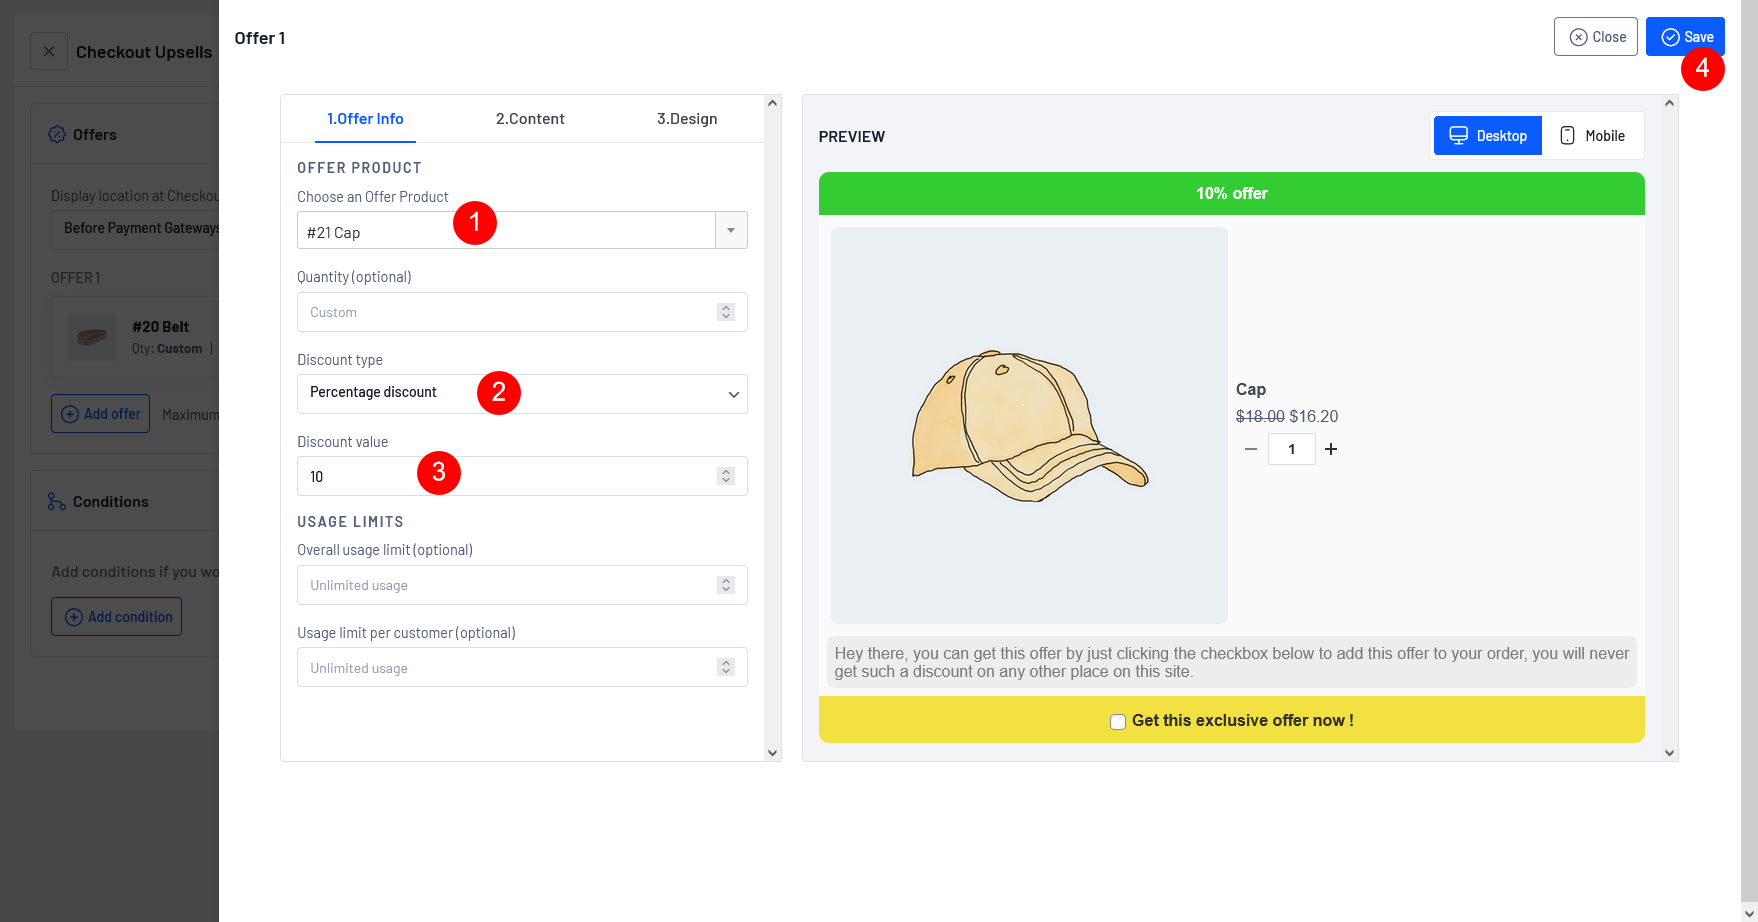
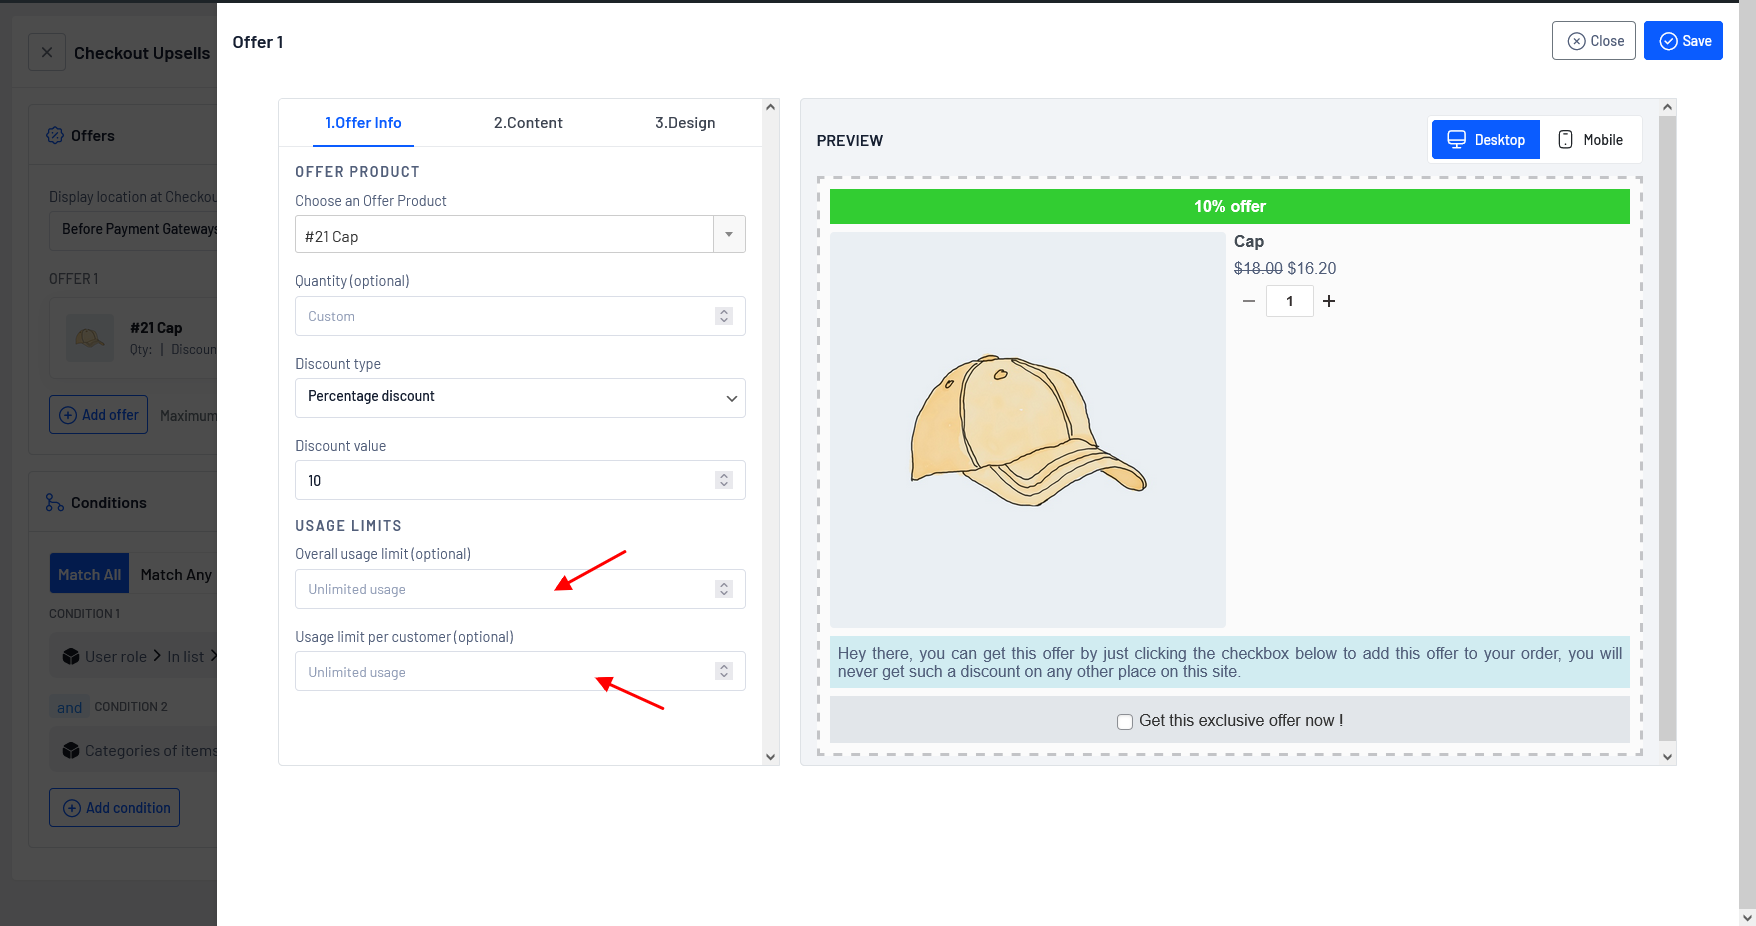
**Step 1:** Choose the offer product (Cap) that you want to display on the offer page by typing a few characters of the product name and setting a quantity for the selected offer product or adjusting the quantity based on your requirement.
**Step 2:** Choose the “Discount Type” as Percentage and set the value as 10%. You also have the option to choose other discount types such as fixed discount, free and No discount.
**Step 3:** You have successfully created an offer, click on the button “Add offer”
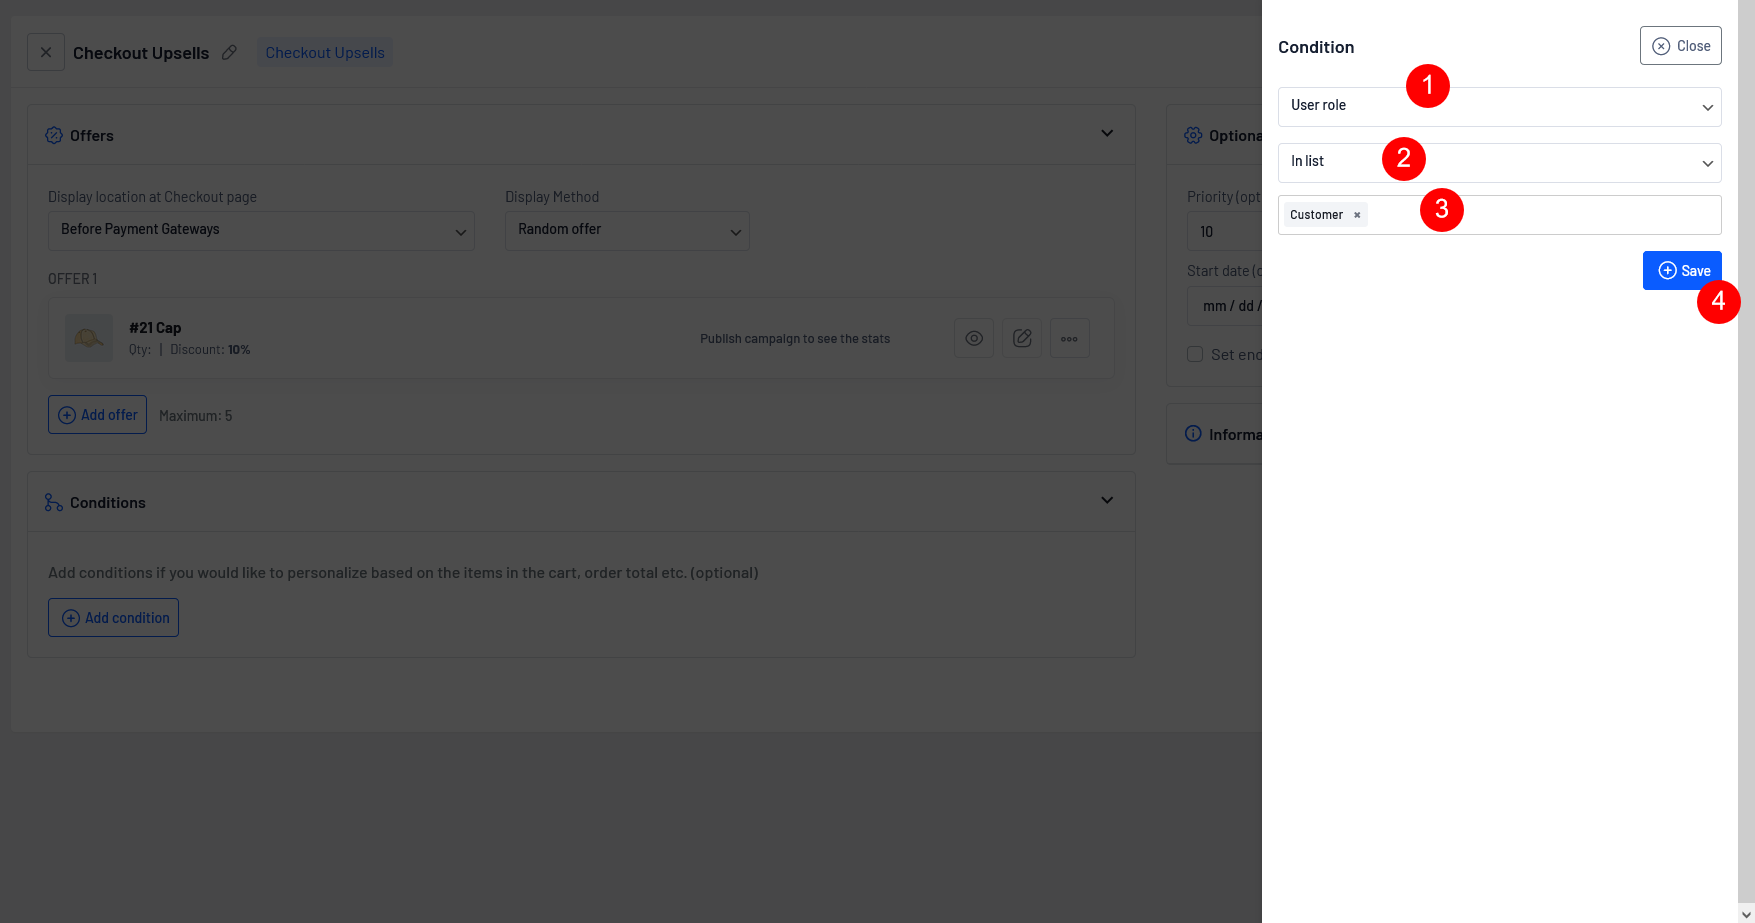
**Step 4:** Now choose the Conditions as “User Role”, In list “Customer”, You also have the option to choose other conditions.
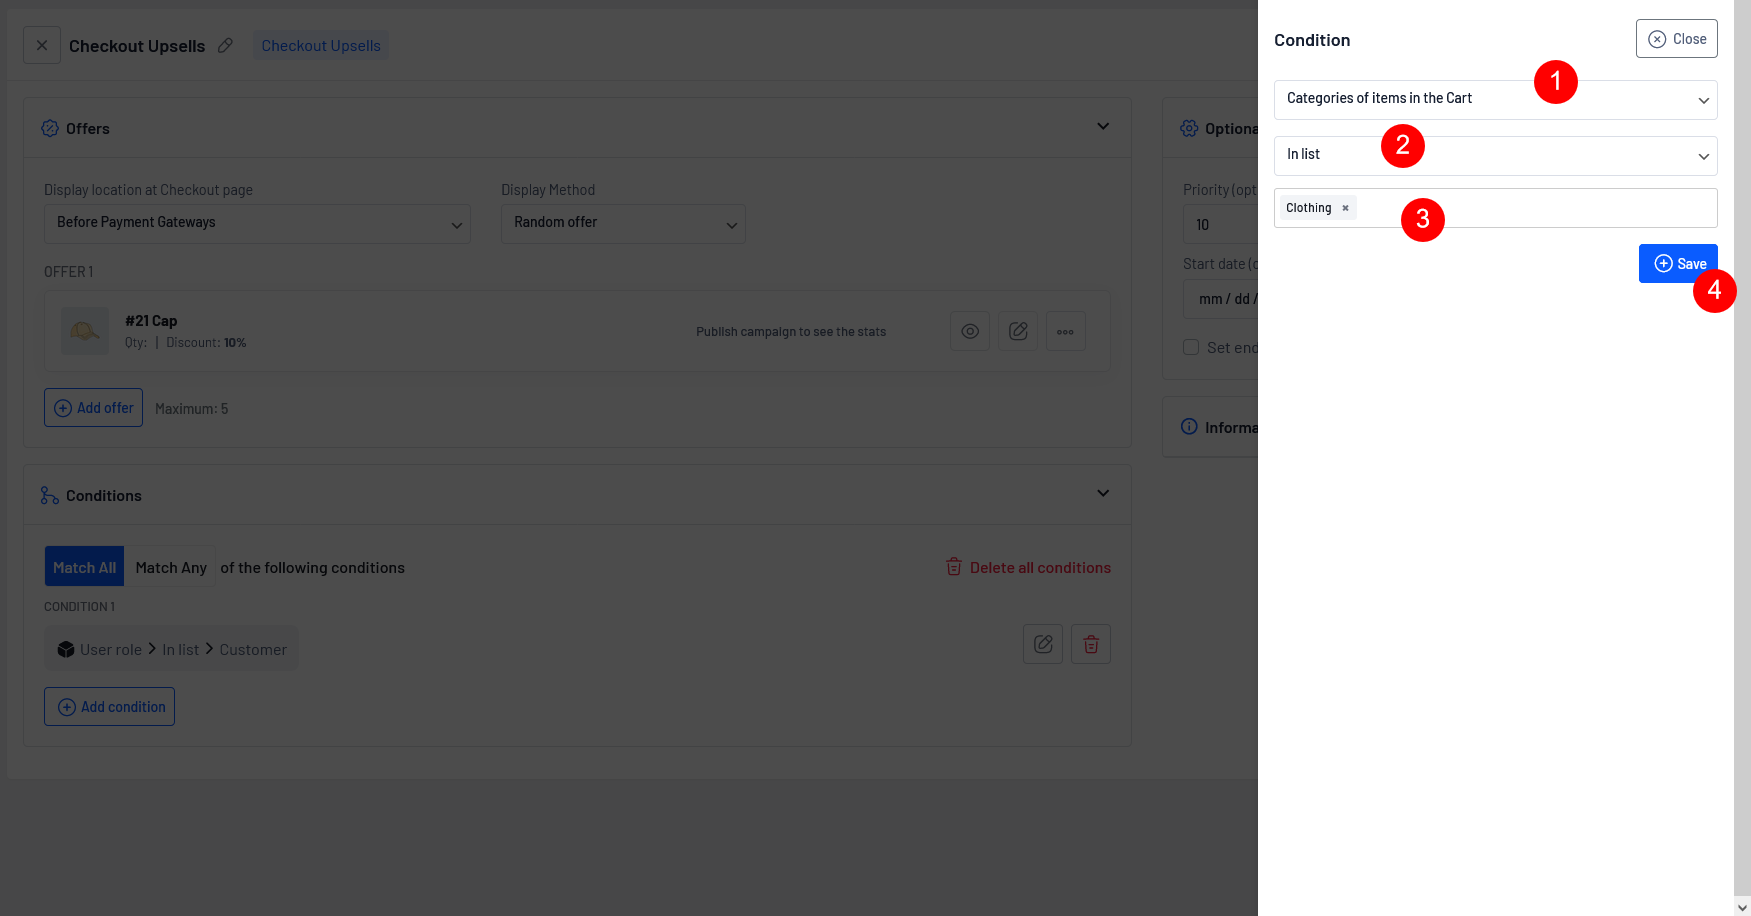
**Step 5:** Now select the other Conditions as “Categories of item in the Cart ”, In list -> Clothing, You also have the option to choose other conditions.
**Step 6:** Once you have successfully created a campaign click Save and Close.
**Other details shown in the below screenshot are (optional):**
**Overall usage limit:** The "Overall usage limit" refers to the maximum number of times an offer can be used by all customers as a whole. Something like early-bird offers for the first 5 users or 10 users.
For example, if the limit is 100, the offer can only be applied to a total of 100 orders, regardless of the number of customers. Once the limit is reached, the offer will get disabled automatically.
**Usage limit per customer:** The “Usage limit per customer” refers to a restriction on the number of times a specific upsell offer can be claimed by an individual customer. It sets a maximum limit on the usage of the upsell for each customer.
For example: If the usage limit per customer is set to 3, it means that each customer can only claim the offer up to a maximum of 3 times. Once a customer has claimed the offer 3 times, they will no longer be able to avail the offer.
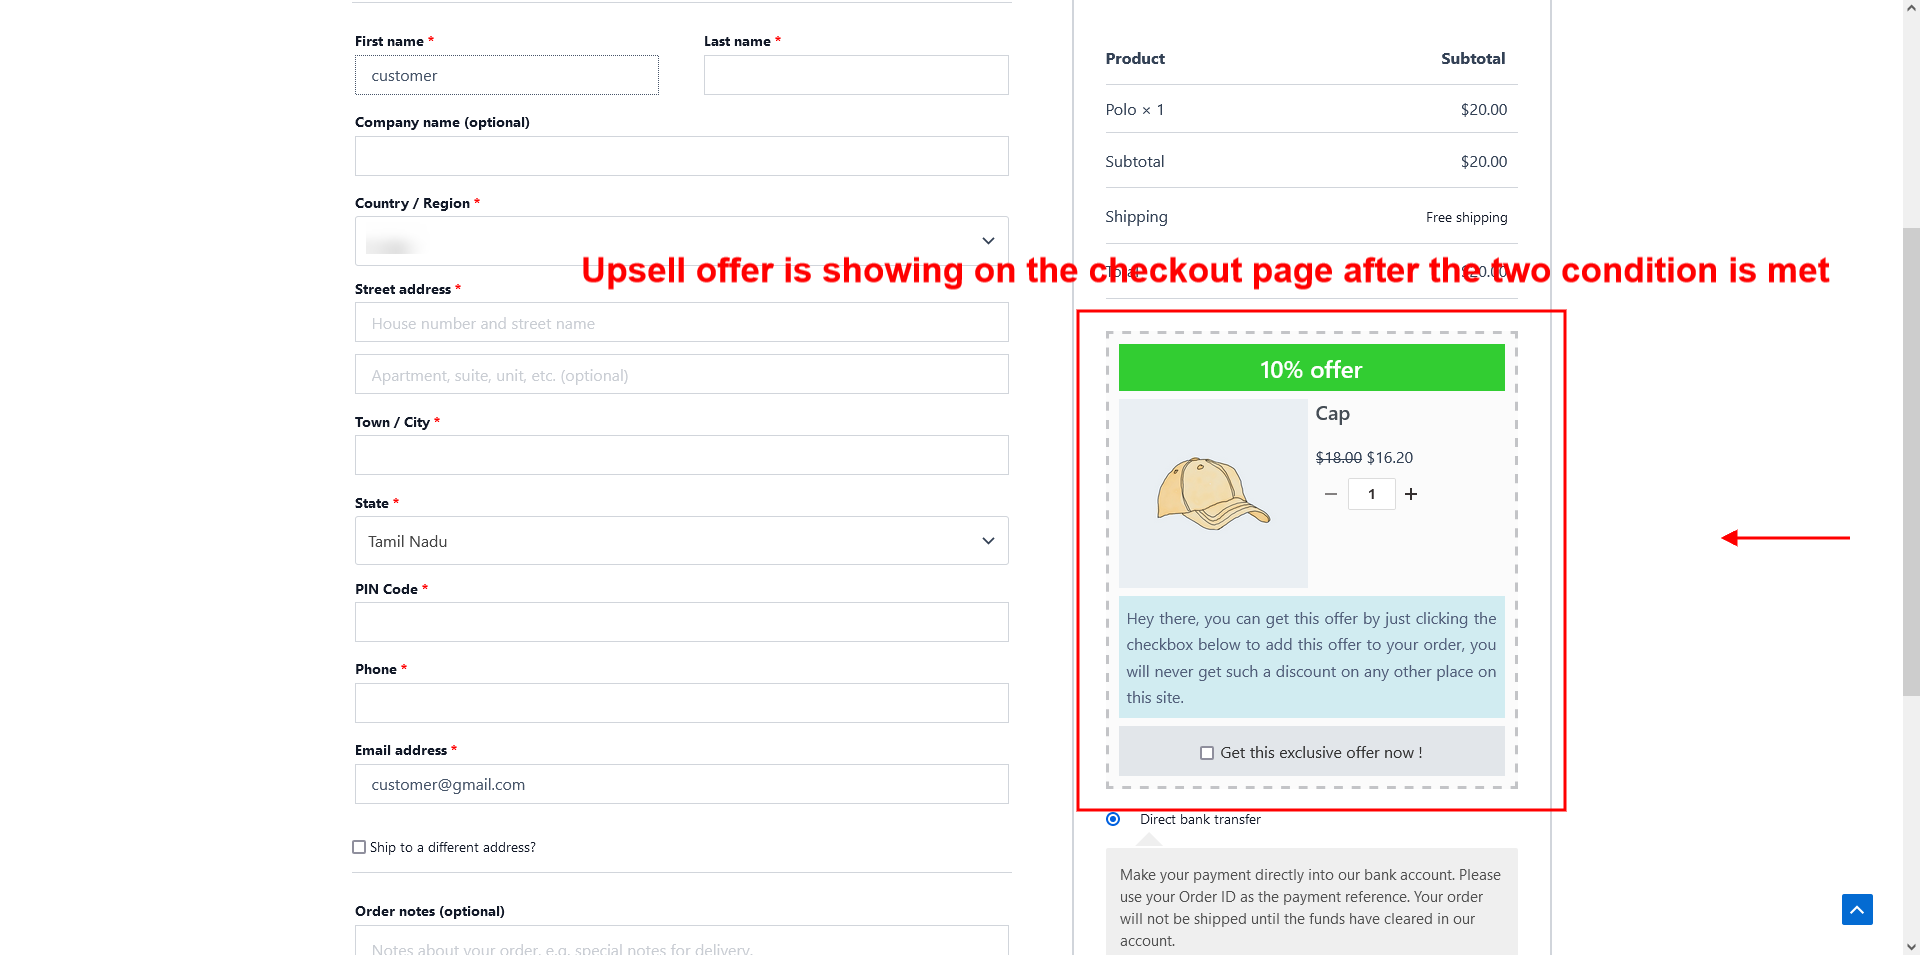
Now, we have successfully created an offer,
**Let's see how it works on the checkout page.**
{% hint style="warning" %}
Some of the above discussed scenarios require PRO
[Get UpsellWP PRO](https://upsellwp.com/)
{% endhint %}
#### Still unclear?
If you need any assistance, please create a[ support request](https://upsellwp.com/support/) at our ticket system. We are always happy to assist you :)